7. Exporting and importing XBee projects
There are some situations where you may want to share your project with another person, work with your project on a different PC, etc. In order to do so, you will need to export your project. You will then be able to import your project onto any machine running CodeWarrior 10.2 with the XBee Extensions.
The XBee Extensions include 2 specific wizards to export and import XBee projects making this processes really easy.
7.1. Exporting a project
To export an XBee project follow these steps:
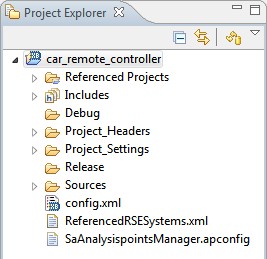
- Select the project you want to export from the Project Explorer view. Please note that the project must be open.
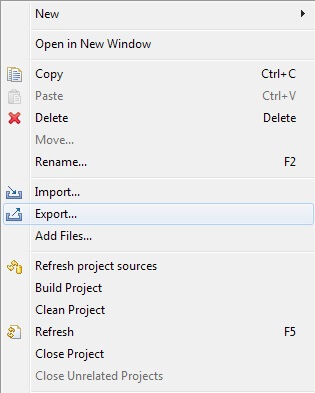
- Right-click on the project and select the Export... option from the menu.
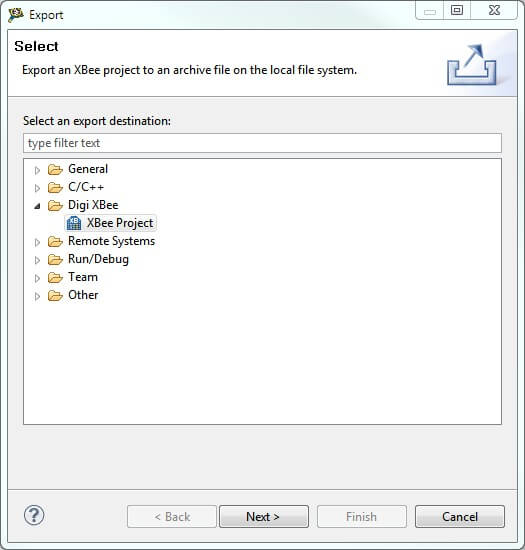
- The Export dialog will be displayed. Select the XBee Project option from within the Digi XBee folder and click Next to open the XBee project export wizard.
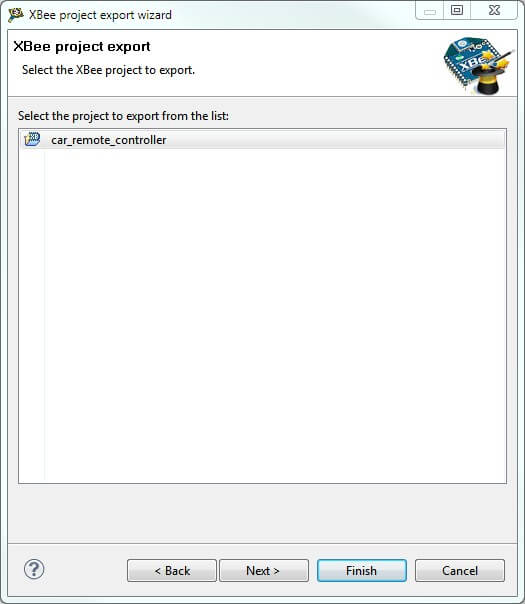
- The first page of the wizard allows you to select the project to be exported. The project that you selected in the Project Explorer view will be selected by default, but you can select and export any other XBee project.
Click Next to continue.
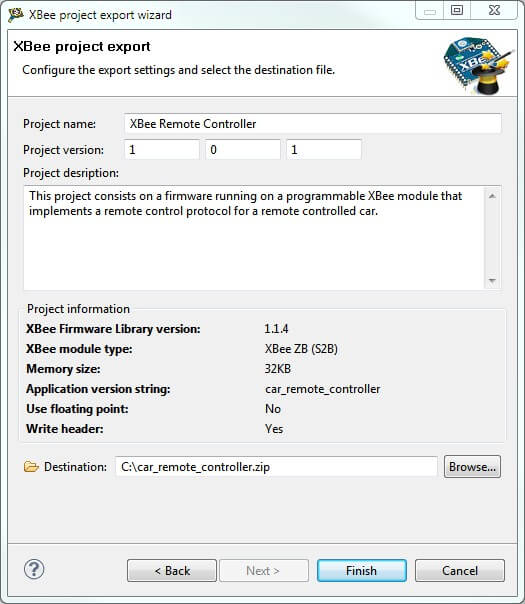
- In the second and last page of the wizard you have to configure some metadata regarding the project such as title, project version (major.minor.revision) and a description. This page also displays the settings of the project that will be exported (library version, module type, memory, etc.)
Click the Browse button and choose the path and file name where the project will be exported.
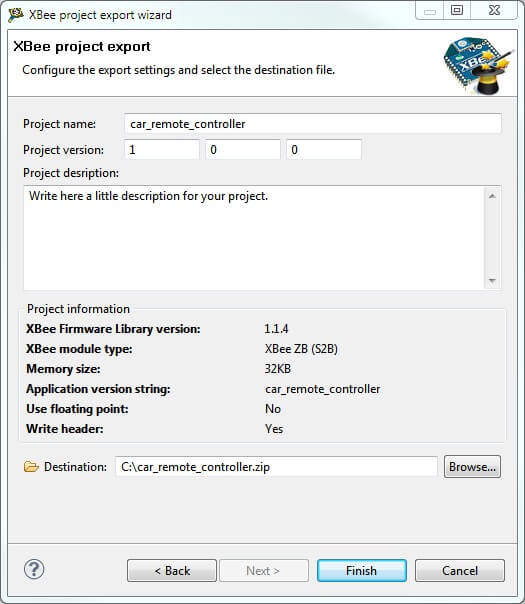
- Click Finish to create a zip file containing the exported project.
7.2. Importing a project
If you have a zip file containing an exported XBee project and you want to import it to your workspace, follow these steps:
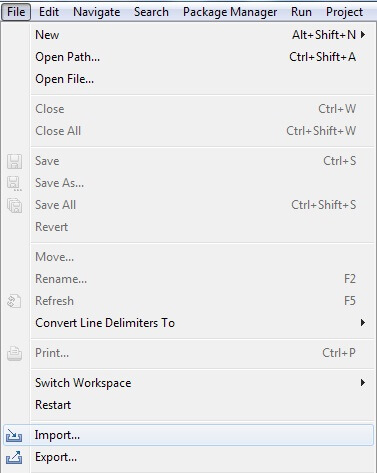
- In CodeWarrior select the File > Import... option from the main menu.
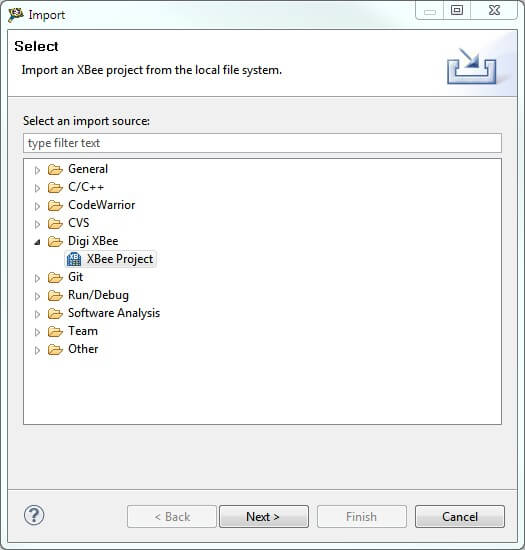
- The import dialog will be displayed. Select the XBee Project option from within the Digi XBee folder and click Next.
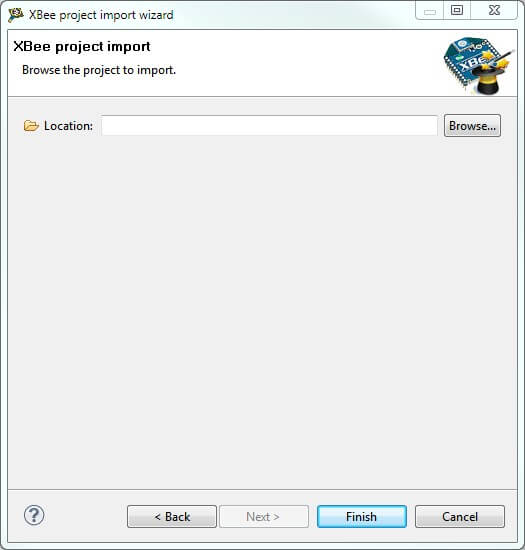
- The XBee project import wizard page allows you to select the project to be imported. Click the Browse button and navigate to the location of the zip file of the XBee project you'd like to import.
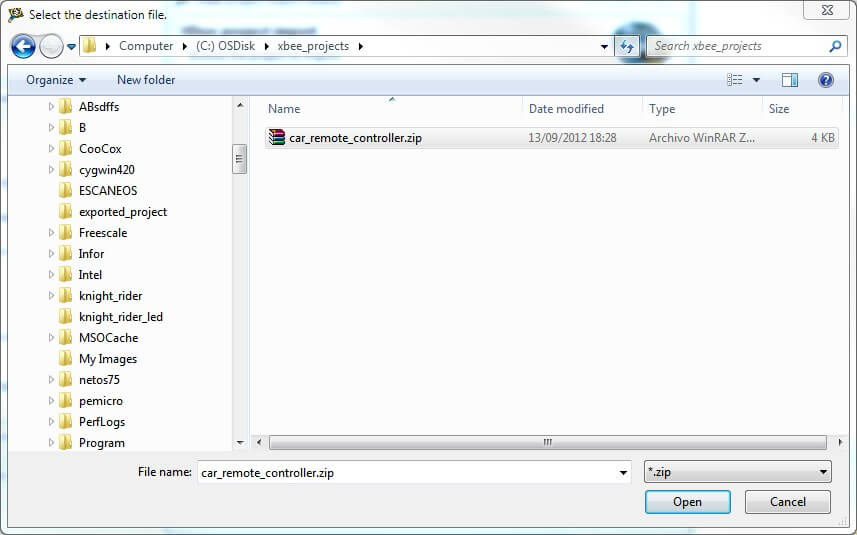
 The zip file of the XBee project being imported must be generated with the XBee project export wizard. If you try to select a zip file of a project that was generated using any other export wizard, you will receive an error and will not be able to import the XBee project.
 - The XBee project import wizard page will be filled with the information regarding the project being imported (title, description, module type, etc.).
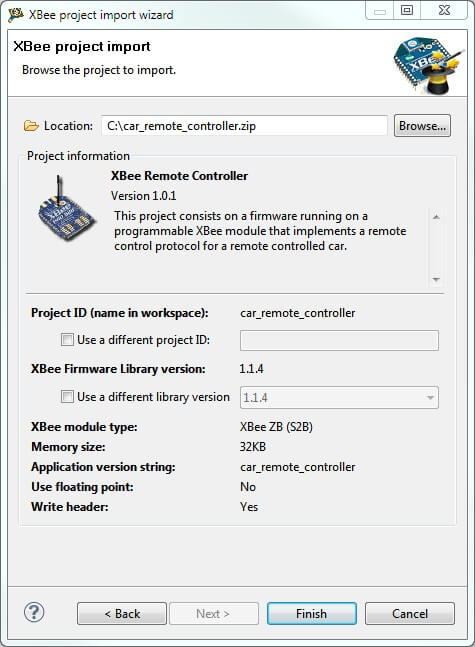
 *Before importing the project, you can change the Project ID, which is the name that the project will have within your workspace, and the XBee Firmware Library version to use one of the libraries you have installed. However, it is recommended to use the default settings unless there is any kind of incompatibility or problem.
 - Click Finish to import the project into your workspace
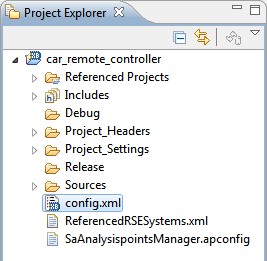
- Your project should be displayed in the Project Explorer view, as shown:
You should now be able to build and debug the imported project.